Manual vs Automatic… let’s take control.

If I’m 100% honest with myself I think to be a decent photographer one must have a real passion for their subject and light….. but one also has to be a bit of a ‘control freak’. Let’s see if I can inspire you to set that camera or smartphone to “manual mode” to shoot….
Whether you are using a beginner, advanced or professional DSLR camera there are usually many options from manual to full auto. There are even options in between like “aperture priority (A)” or “shutter speed priority (A)” so you can ease yourself into the idea of shooting in full manual mode. Even on a lot of phones these days you have options to control your imagery and if not there are certainly apps you can download that will do so to a degree.
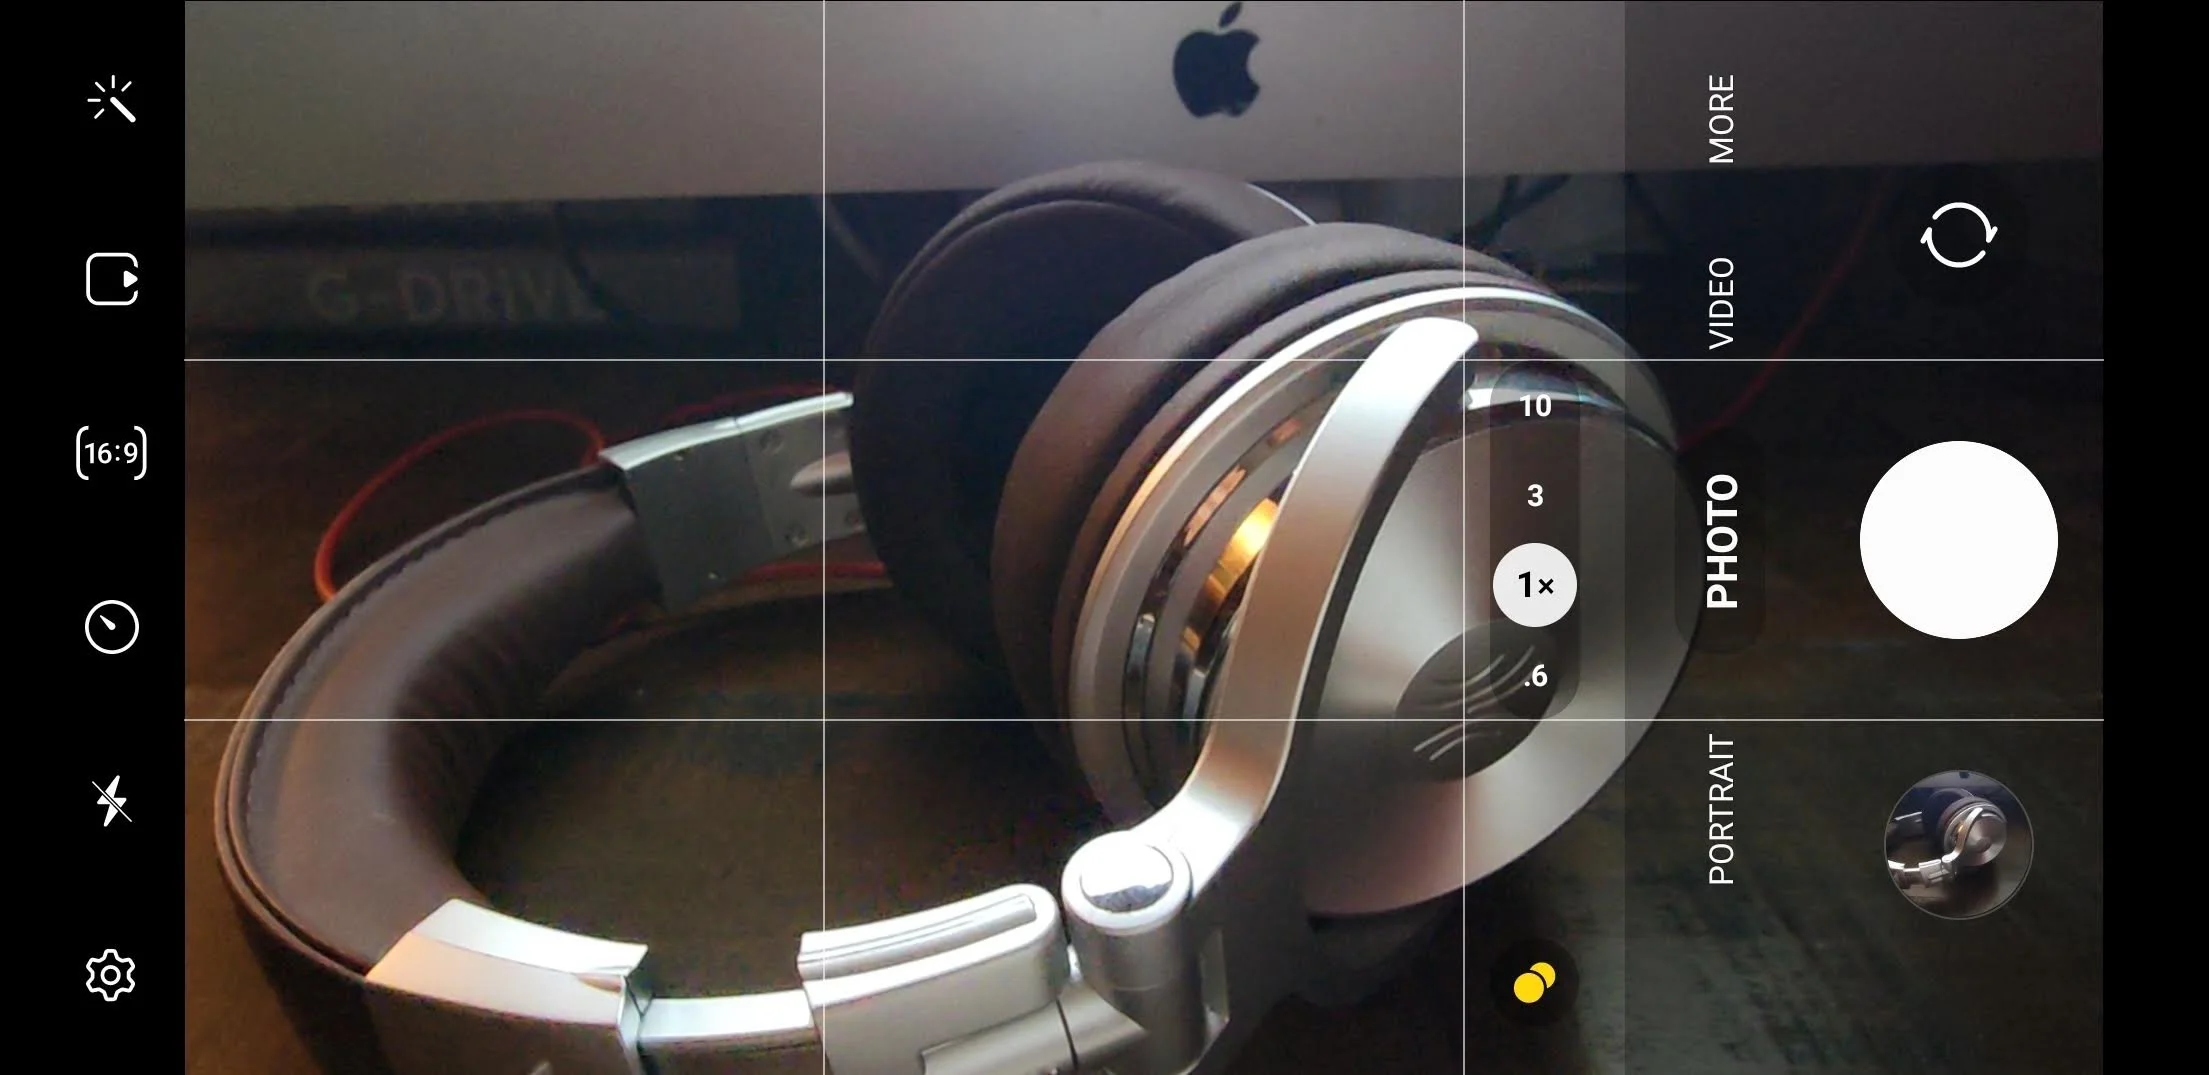
Automatic Mode on Samsung S22 Ultra (screenshot)
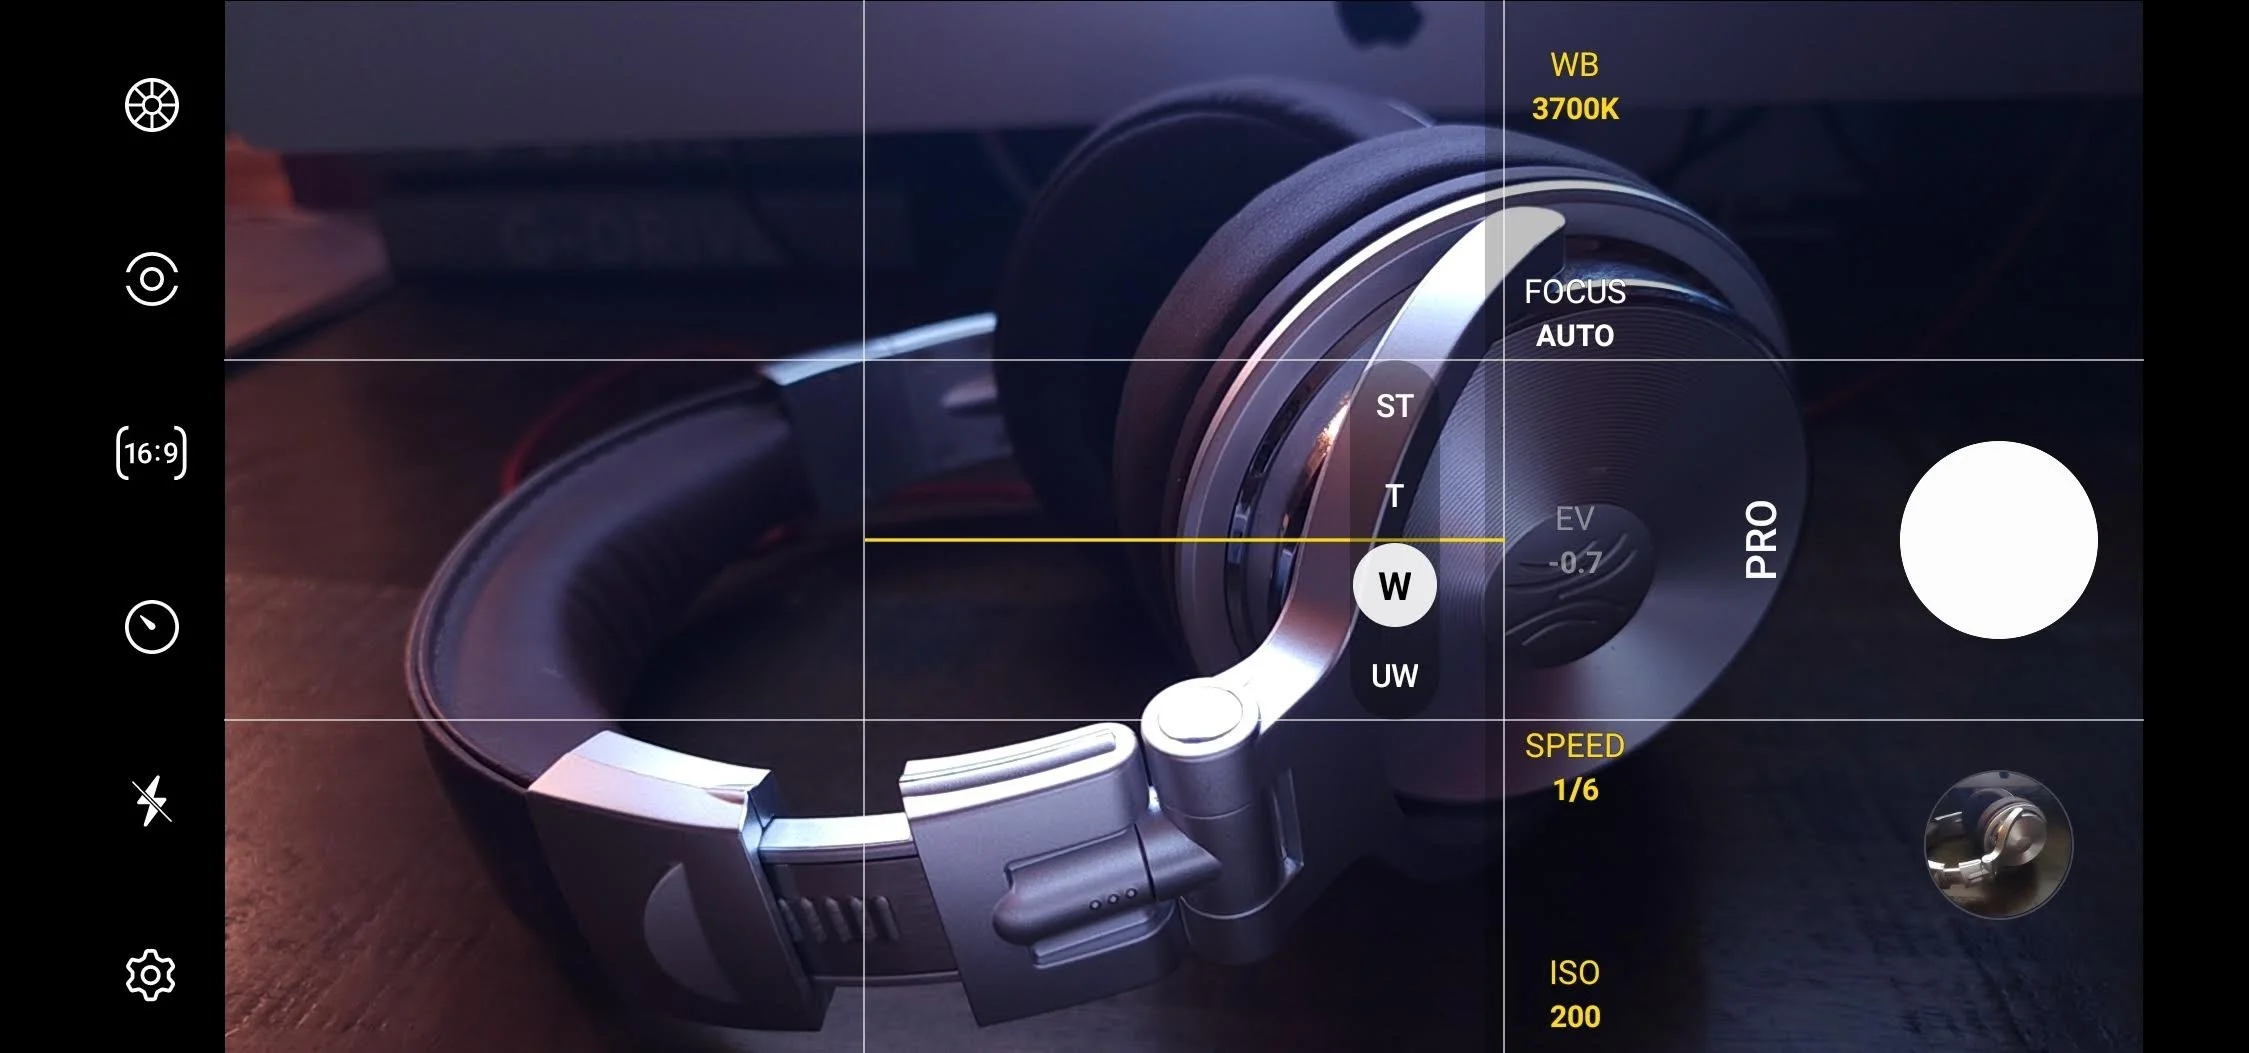
Pro Mode on Samsung S22 Ultra (screenshot)
The fact remains though that you picked up that camera to document something…. the way you saw it and not the way a microchip saw it am I right? For “run and gun” type shooting automatic will certainly serve its purpose BUT when you are in that beautiful spot on your vacation and the Sun does its Golden Hour splendor…. are you really going to leave that to chance and not be in control? Maybe you just want to tweak one aspect of that photo because auto mode isn’t capturing it the way you are seeing it. I’m going to go over some basics and in my usual fashion I’ll probably put a little twist on them to make it as easy as possible to understand and appreciate.
Shutter Speed:
For the sake of consistency and imagination since I mentioned vacation and the Sun above I will relate each sub topic to a beach vacation. I think most people get the basic concept of Shutter Speed but just in case… think of it as the exact moment you are trying to freeze time. If you are lying in bed in the dark you probably aren’t blinking as much as I am while I’m typing this blog staring at a computer screen. Your eye lids are probably more relaxed and blinking a bit slower than when you are in brighter environments. Shutter speeds are measured in fractions of a second. Example, for most cameras you will need at least 1/60 to freeze some motion ( this also really depends on how fast your subject is moving ) like your kids running on the beach. You may find even with this setting that parts of them that are moving really fast like their feet may still show some motion blur or if you are panning your camera the background may have some motion blur. Neither of which is necessarily bad… being able show captured motion can make an image more dynamic and tell a better story. If your intention was to have zero motion blur the first thing you want to try is bumping up that shutter speed but if you are shooting in manual mode this probably means you will have to compensate with other settings otherwise your image may be too dark. Making sense so far?
Aperture / f-stop
I’ve always liked explaining this setting. I always see the exact moment in people’s eyes when the lightbulb turns on! So depending on what you are imagining in your minds-eye setting either the shutter speed or aperture should come first. If you are trying to capture motion then start with your shutter speed. If you are hoping to capture an object or setting with selective focus and some awesome Bokeh (blur) in other spots like the background…. start with your aperture. Learning to see the image you want in your mind first goes a long way in your development. We used to call that “pre-visualization” but with digital capture the technique seems to be forgotten a bit. It was also expensive to buy and develop film so we also couldn't afford not to pre-visualize or screw up our clients project. Okay so next I’m going to show you the quickest and easiest way to understand the basics of aperture. Take a little break, stand up and stretch your legs, go to the kitchen and bring a fork back with you.

Now let’s do a very simple experiment! Hold the fork in your hand and then hold it out in front of your face. Now focus on the fork…. See how everything in the background in blurry now. That is your eye “aperture” wide open and letting in as much light as possible. Now I’d like you to start squinting your eyes to various degrees. What you will see is some of those things in the background coming more into focus. The squinting is stopping down (closing) your eye “aperture(s)” which means your focal range is increasing. See how that is working? So to put that into our sunny beach vacation scenario maybe you’d like to have a picture of your kids shovel in the sand with the beach and ocean in the background. A wide open aperture (smaller numbers like 1.8-5.6) would give you more focus fall off than smaller aperture settings that are higher (squinting). All of this also depends on how close you are to your subject and there are diagrams that show this but I want to keep this basic for you. Just enough to up your game and maybe capture some interest into starting down this awesome path. We are almost done and you’re doing great! One more topic for todays post and then you can go and play…… remember to put the fork back in the kitchen though….
ISO (aka Film Speed for us old heads)
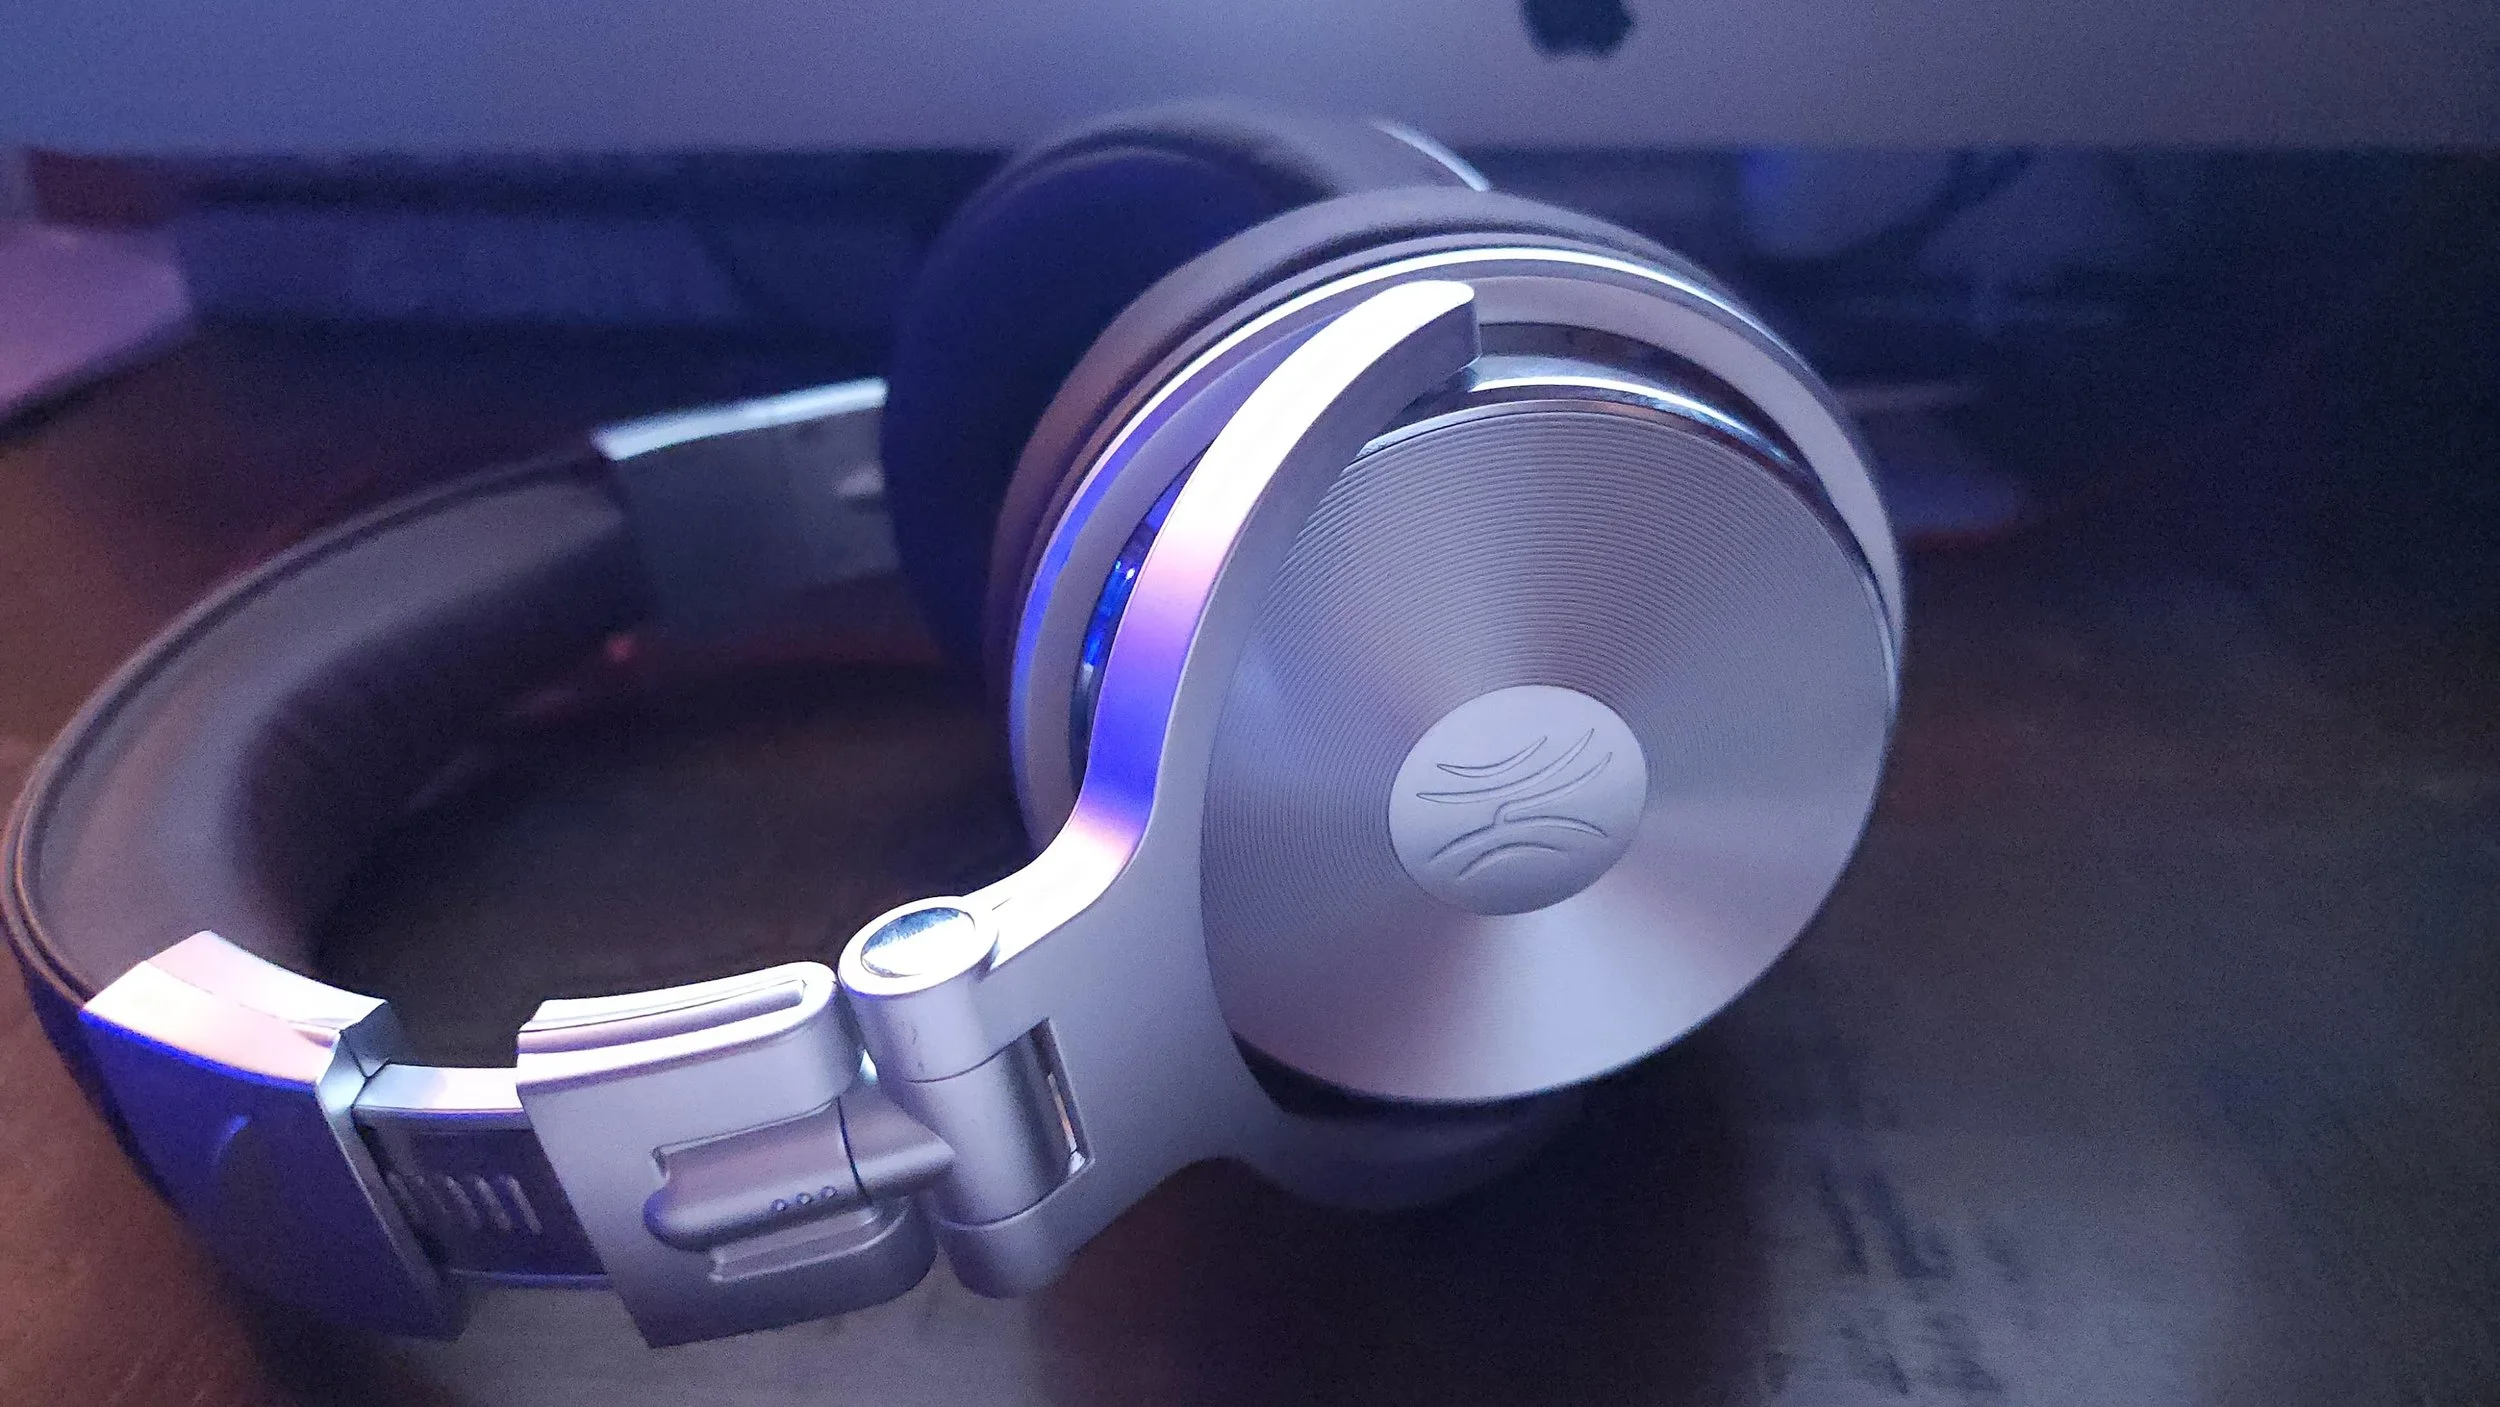
Okay, this one has always been pretty simple for me and my style of shooting. I 99.9999% will alway set my ISO to the lowest setting possible even though some cameras today can go very high with very little adverse effect on an image. The effect I am writing about is “noise” or “grain”. There are indeed times that we may want to have grain in an image to give it a certain feel but for me personally that is pretty rare. So the lower you set your ISO the cleaner your image will appear BUT higher ISO’s are spectacular for shooting in darker scenes like a dark room or night time on the beach. So once you have set your shutter speed and aperture if your image is still underexposed you will want to tweak your ISO to compensate. Below there are two images with settings shown to show the difference. Compare to 1/4 top right sections in each photo.

Samsung SM-S908U
F1.8
1/6 s
6.40mm
ISO 200
White balance Manual No flash
Samsung SM-S908U
F1.8
1/60 s
6.40mm
ISO 3200
White balance Manual No flash
Of course there are other settings we could discuss like White Balance and Exposure Compensation but I think this is a good start. If you would like to dig in on your own Youtube has some great videos that can explain just about anything! If you decide to to do that definitely look up shooting Jpeg vs RAW files.
Why am I writing this? Do I want to replace professional photographers?…. no not really BUT I do want you to document your lives in a beautiful fashion. There are some things that a pro will always be better at since they have put in real work to learn their craft. That doesn’t mean that you shouldn’t be able to a great picture in a pinch. When it’s all said and done and your kids have their own families I promise you will truly treasure the the images you took and the moments you captured that you can now look back on and reminisce. Not only that…. your kids and grandkids will too! Get at it my friends…… there is no “fail” there is only “Try!”.
To stay up to date or receive weekly inspiration direct to your email please be sure to subscribe to this blog at the very bottom of the page. Your email will never be shared with anyone.
Cheers,
-7
www.exvotostudio.com